

Wheel Speed Sensor Installs
Sensors, Magnets, and Wheel Sizes
Learn how to install different model-specific wheel sensors, attach the sensor magnet, and accurately measure your wheel size for Trail Tech Digital Gauges.
Wheel Sensors
Wheel speed sensors detect wheel rotation and send signals to the digital gauge. This allows the gauge to calculate speed and distance. Proper mounting ensures the sensor accurately captures the wheel's movement.
Trail Tech offers various sensor options, tailored to specific vehicle models:
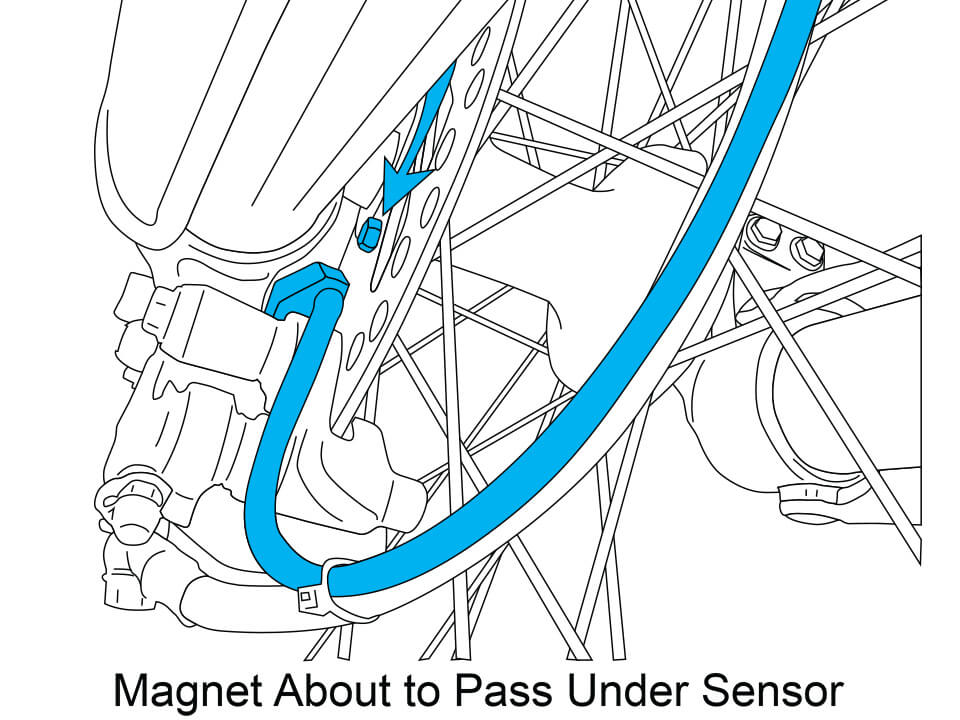
KTM Style Wheel Speed Sensor
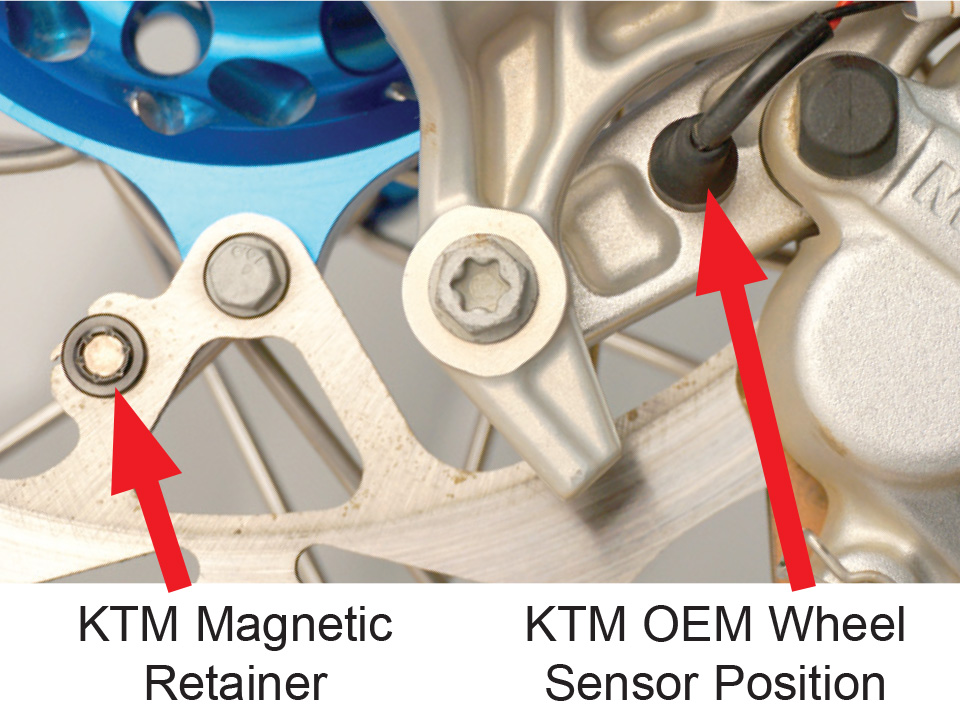
- Install the wheel sensor into the OEM caliper position.
- Insert the black magnet into the rotor hole and secure it with the retainer clip.
Conventional Fork Wheel Speed Sensor
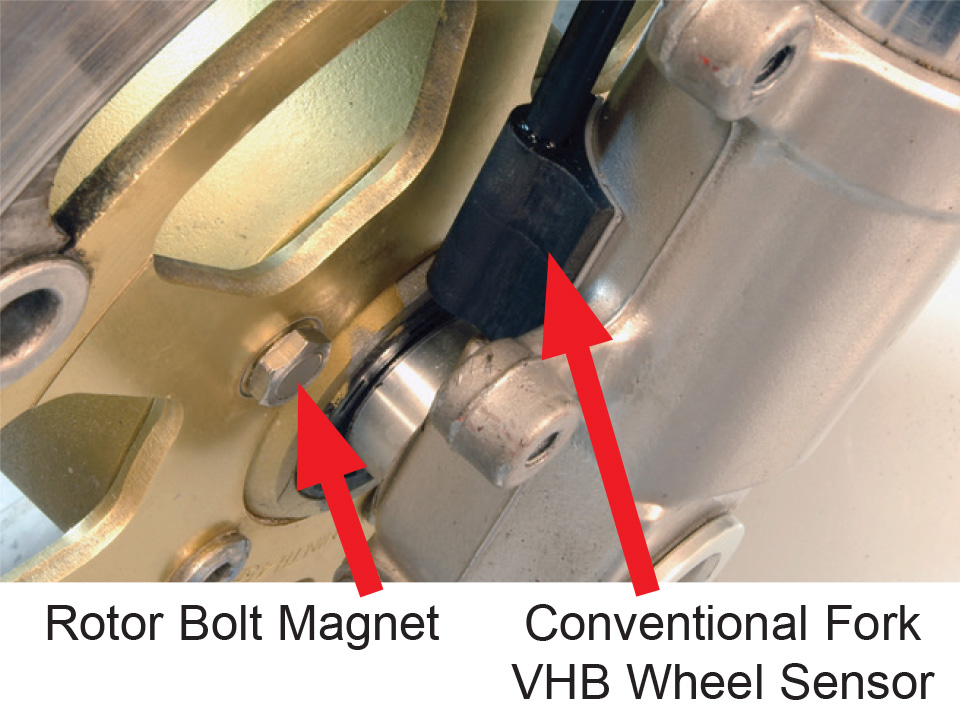
- Peel off the backing and stick the sensor to the fork.
- Position the sensor tip about 1/2 inch from the rotor magnet.
Inverted Fork Wheel Speed Sensor
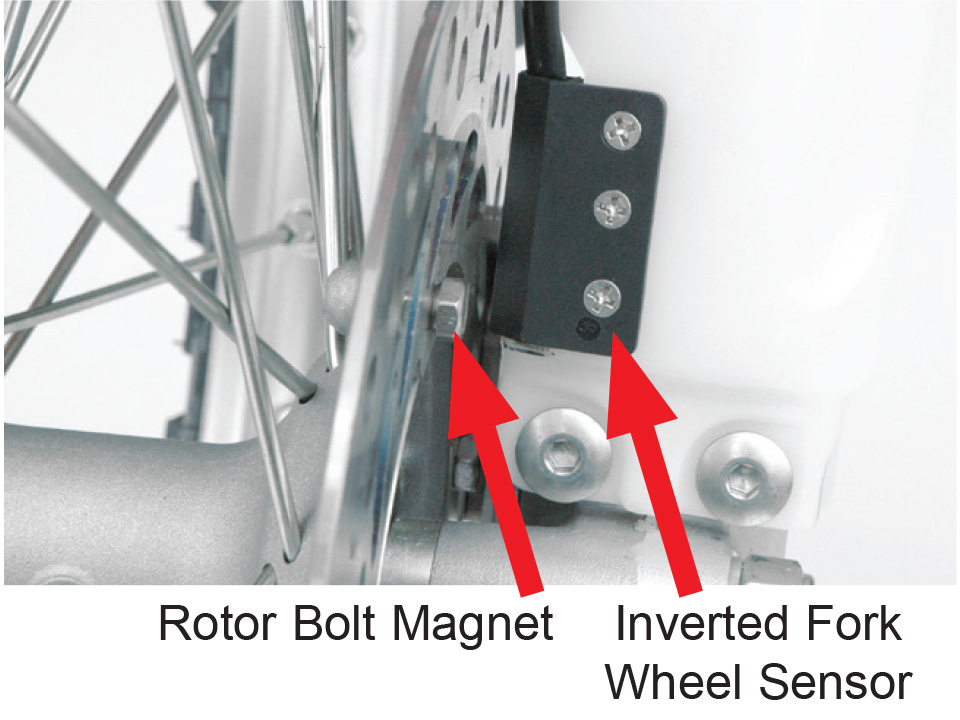
- Mount the sensor to the fork guard using the bolts provided.
- Ensure proper alignment by shaving the fork guard if necessary.
- Position the sensor tip about 1/2 inch from the rotor magnet.
Rotor Shield Wheel Speed Sensor
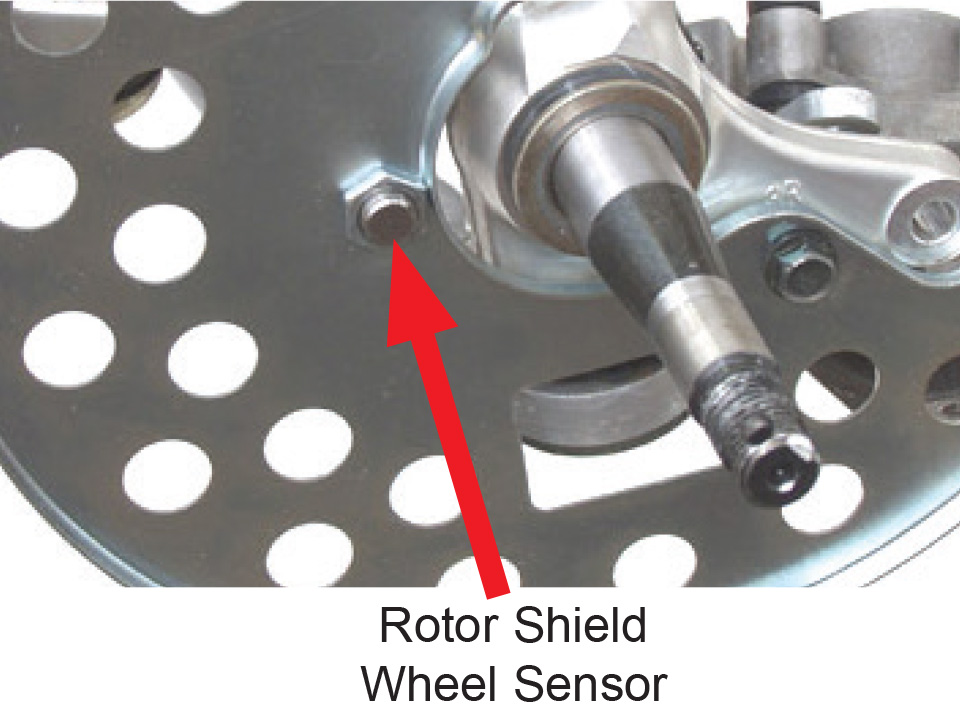
- Drill a 3/8 inch hole and secure the sensor using jam nuts.
- Use Loctite for security instead of over-tightening.
ATV Brake Caliper Wheel Speed Sensor
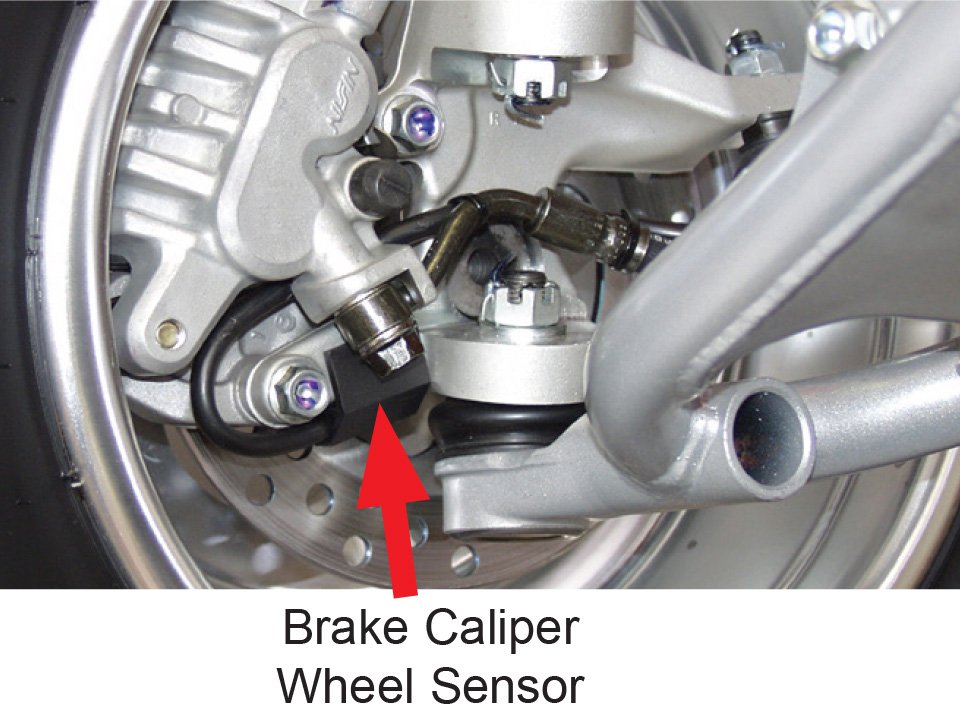
- Drill a 1/8” hole in the caliper mount and secure the sensor with a self-tapping screw.
ATV C-Bracket Wheel Speed Sensor
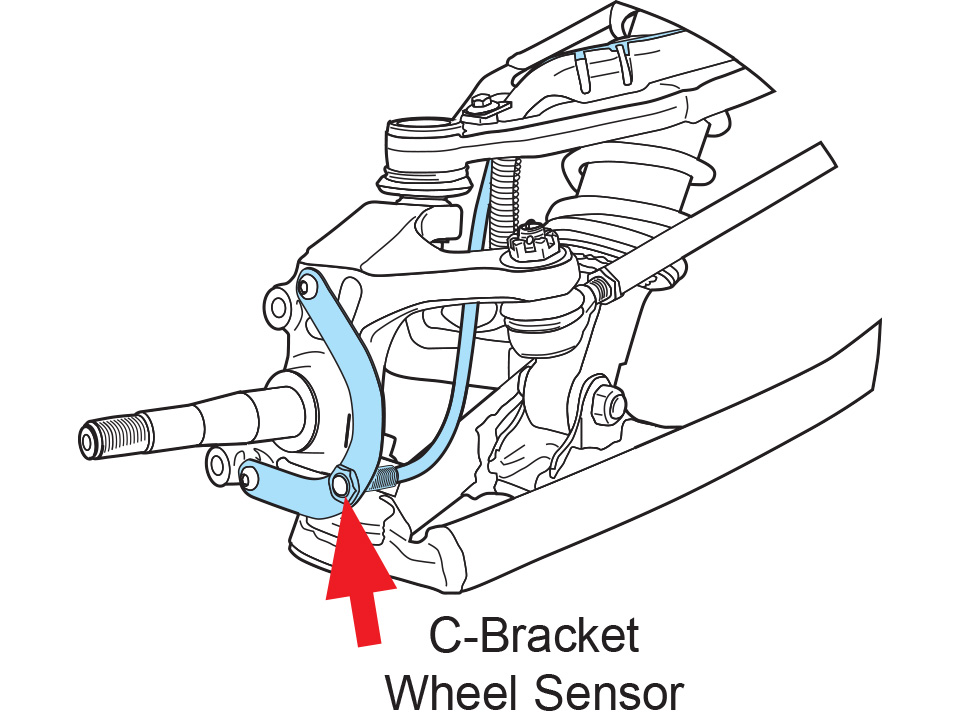
- Secure the sensor to the C-bracket using jam nuts.
- Apply Loctite to secure without over-tightening.
Magnet Installation
Magnets attached to the brake rotor trigger the speed sensor as the wheel rotates, sending signals to the gauge for speed and distance calculation.
There are three common ways to install a magnet:
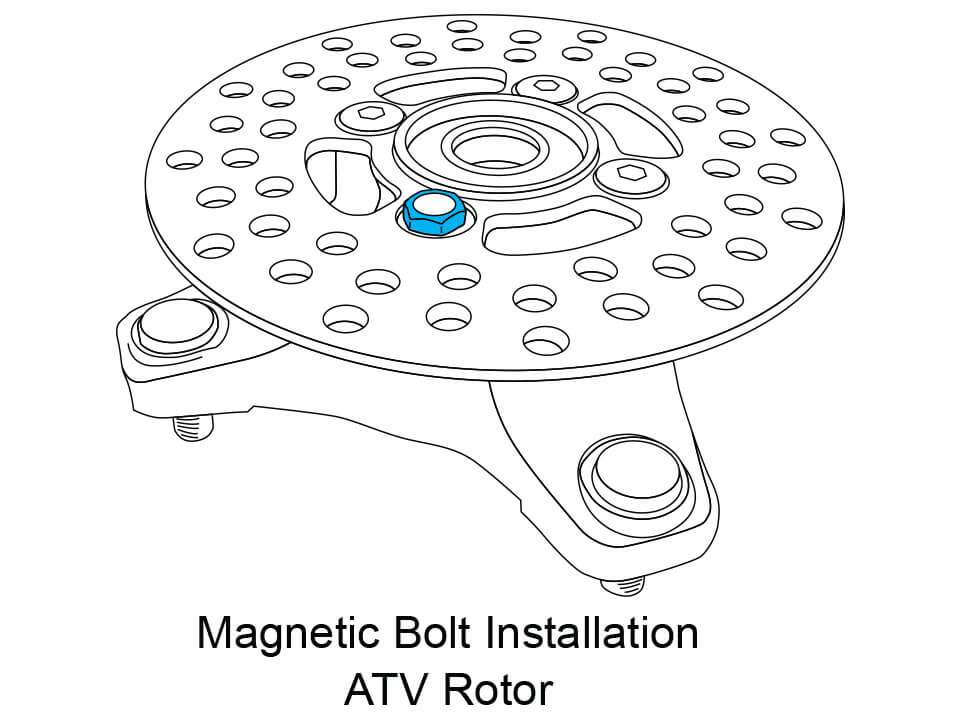
Replace with a Magnetic Rotor Bolt

- Remove one stock rotor bolt.
- Install the magnetic rotor bolt.
- Do not exceed 10 ft-lb of torque when tightening.
Install a Spare Magnet in the Rotor
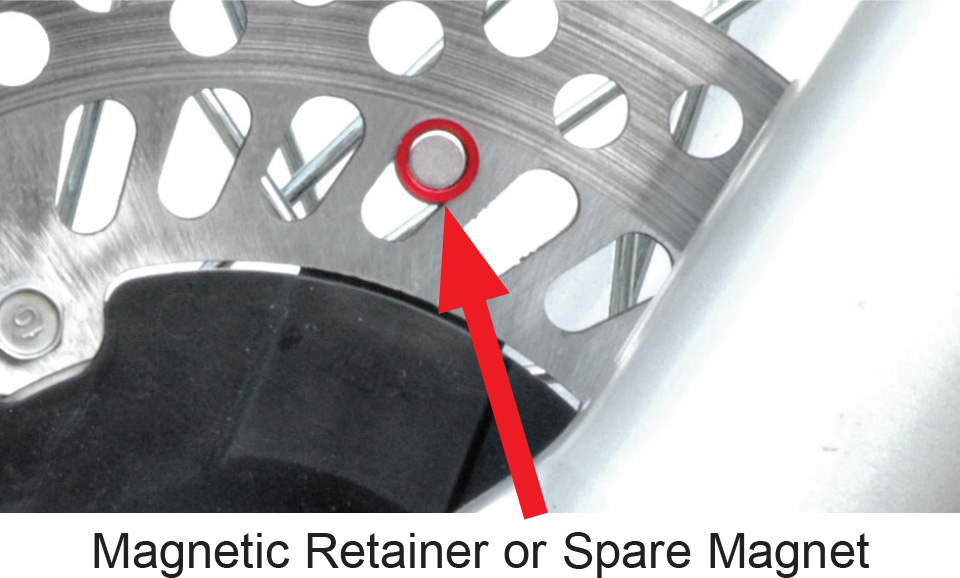
- Install the spare magnet in a rotor space using the retainer clip or epoxy.
Wheel Sensor Test
Before final installation, ensure proper placement by performing a test:
- Lift the vehicle so the front wheel spins freely.
- Plug the sensor into the digital gauge.
- Install the magnetic bolt and temporarily hold the sensor in place.
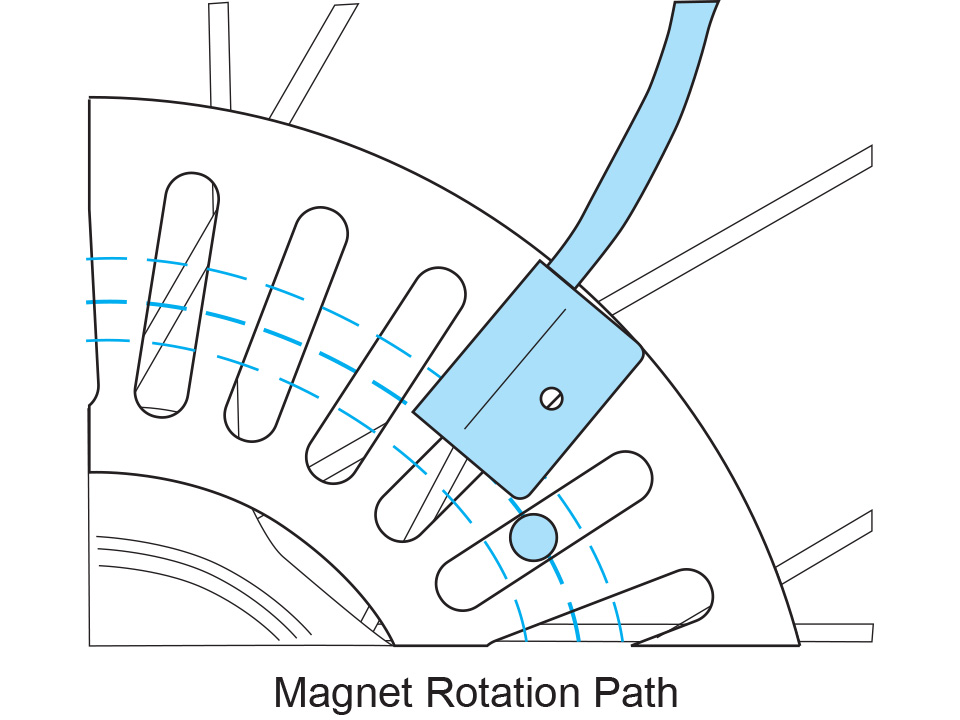
- Spin the wheel while checking if the gauge registers the rotation. Adjust the sensor or magnet if needed. There should be no more than a 1/2 inch gap between the sensor and the magnet.
Ensure that the magnet passes by the sensor tip, not the middle. Misalignment may result in inaccurate readings or double counting. If double-triggering occurs, divide the wheel size by 2 to correct the issue.
Measure Wheel Size
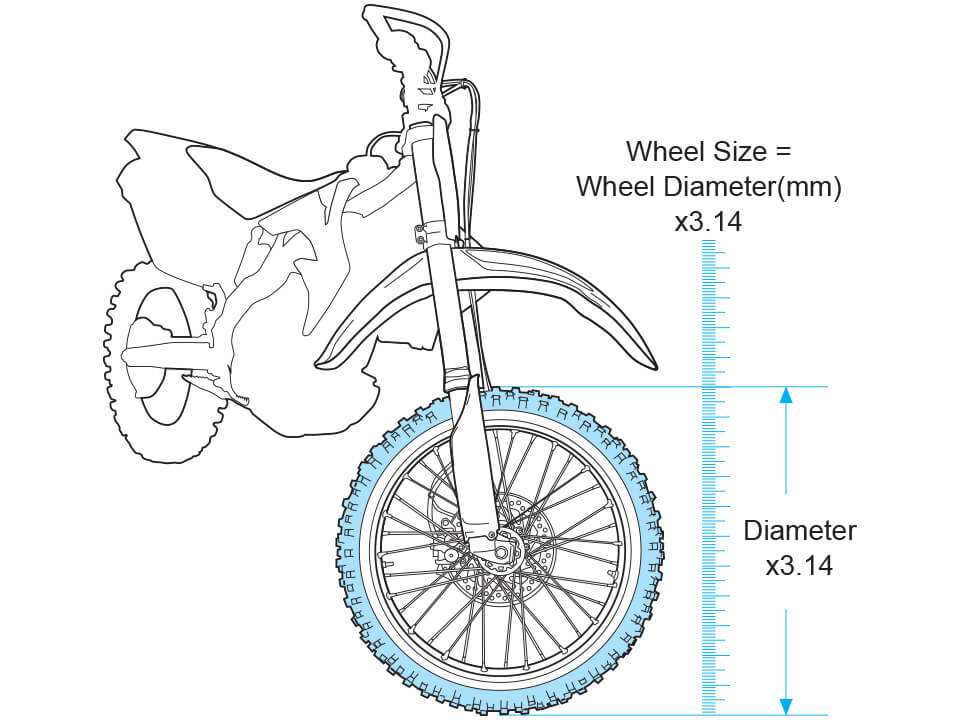
Accurate wheel size measurement ensures the wheel sensor calculates correct speed and distance. There are several methods to measure wheel size:
Use a Ruler to Measure the Wheel
Measure the wheel diameter in millimeters to calculate the circumference:
- Multiply the wheel diameter by 3.14 to get the circumference.
- Enter this value as the wheel size in the digital gauge setup.
The Rolling Method
This method provides more accurate measurements using chalk marks:
- Mark the tire and ground with chalk at the starting position.
- Roll the wheel one full revolution and mark the ground again.
- Measure the distance between the marks in millimeters.
The Long-Distance Method
For high precision, use a known distance on a straight road to calculate the wheel size:
- Set the initial wheel size (e.g., 2110 mm for motorcycles or 1675 mm for ATVs).
- Ride a known distance and compare the gauge reading to the actual distance.
- Adjust the wheel size using this formula: New wheel size = actual miles x (current wheel size / current miles).
Average Wheel Sizes
If precise measurement isn't possible, use the following average sizes for quick calibration:
- Motorcycle: 2110 mm
- ATV: 1675 mm

